
Treat automatic findings as pointers: jump to the timestamp, inspect the spectrum or spectrogram, listen, and then correct the source or signal chain.
Start with evidence, not a label
Clipping, hiss, and electrical hum can all make a recording feel unprofessional, but they have different causes and require different repairs. A single overall number cannot distinguish them. The useful evidence is a combination of level, frequency shape, persistence, and the exact time at which the condition appears.
Automated diagnostics are most valuable when they shorten the search. A timestamp lets you move directly to a suspicious passage instead of replaying a long file from the beginning. The final decision should still combine the measured trace with critical listening, because intentional distortion, sustained tones, room ambience, and music can resemble faults under simplistic rules.
Recognize digital clipping
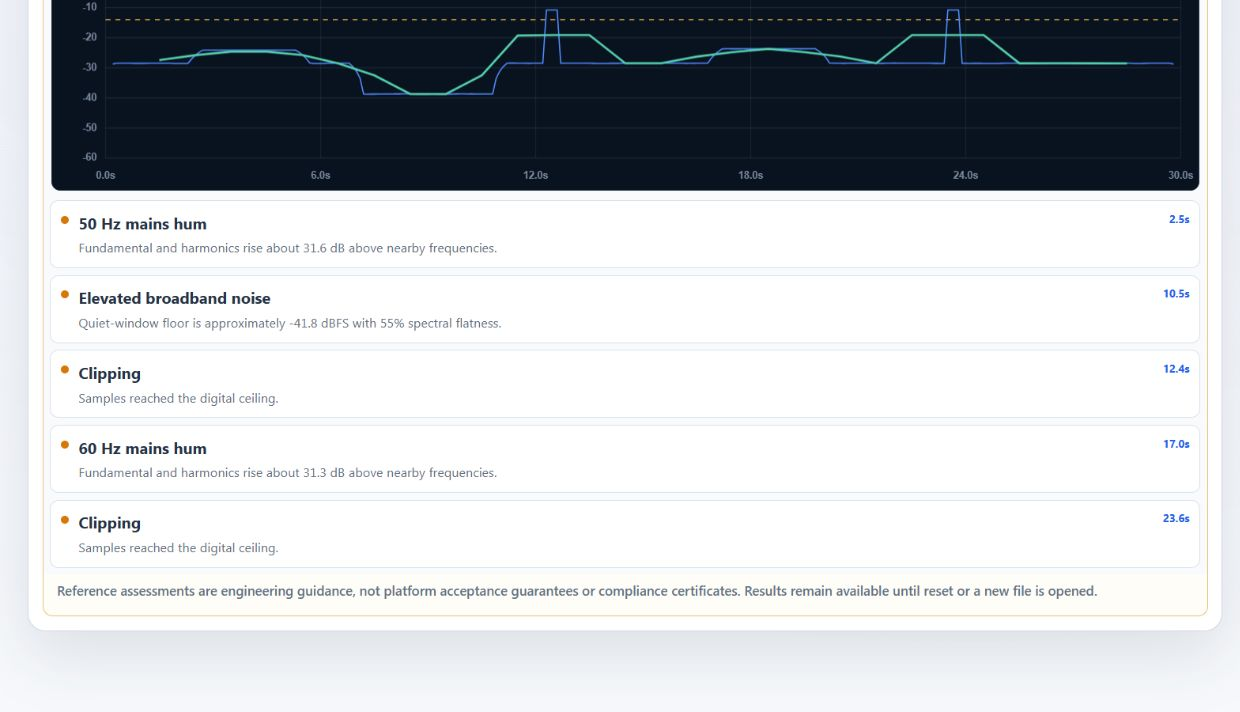
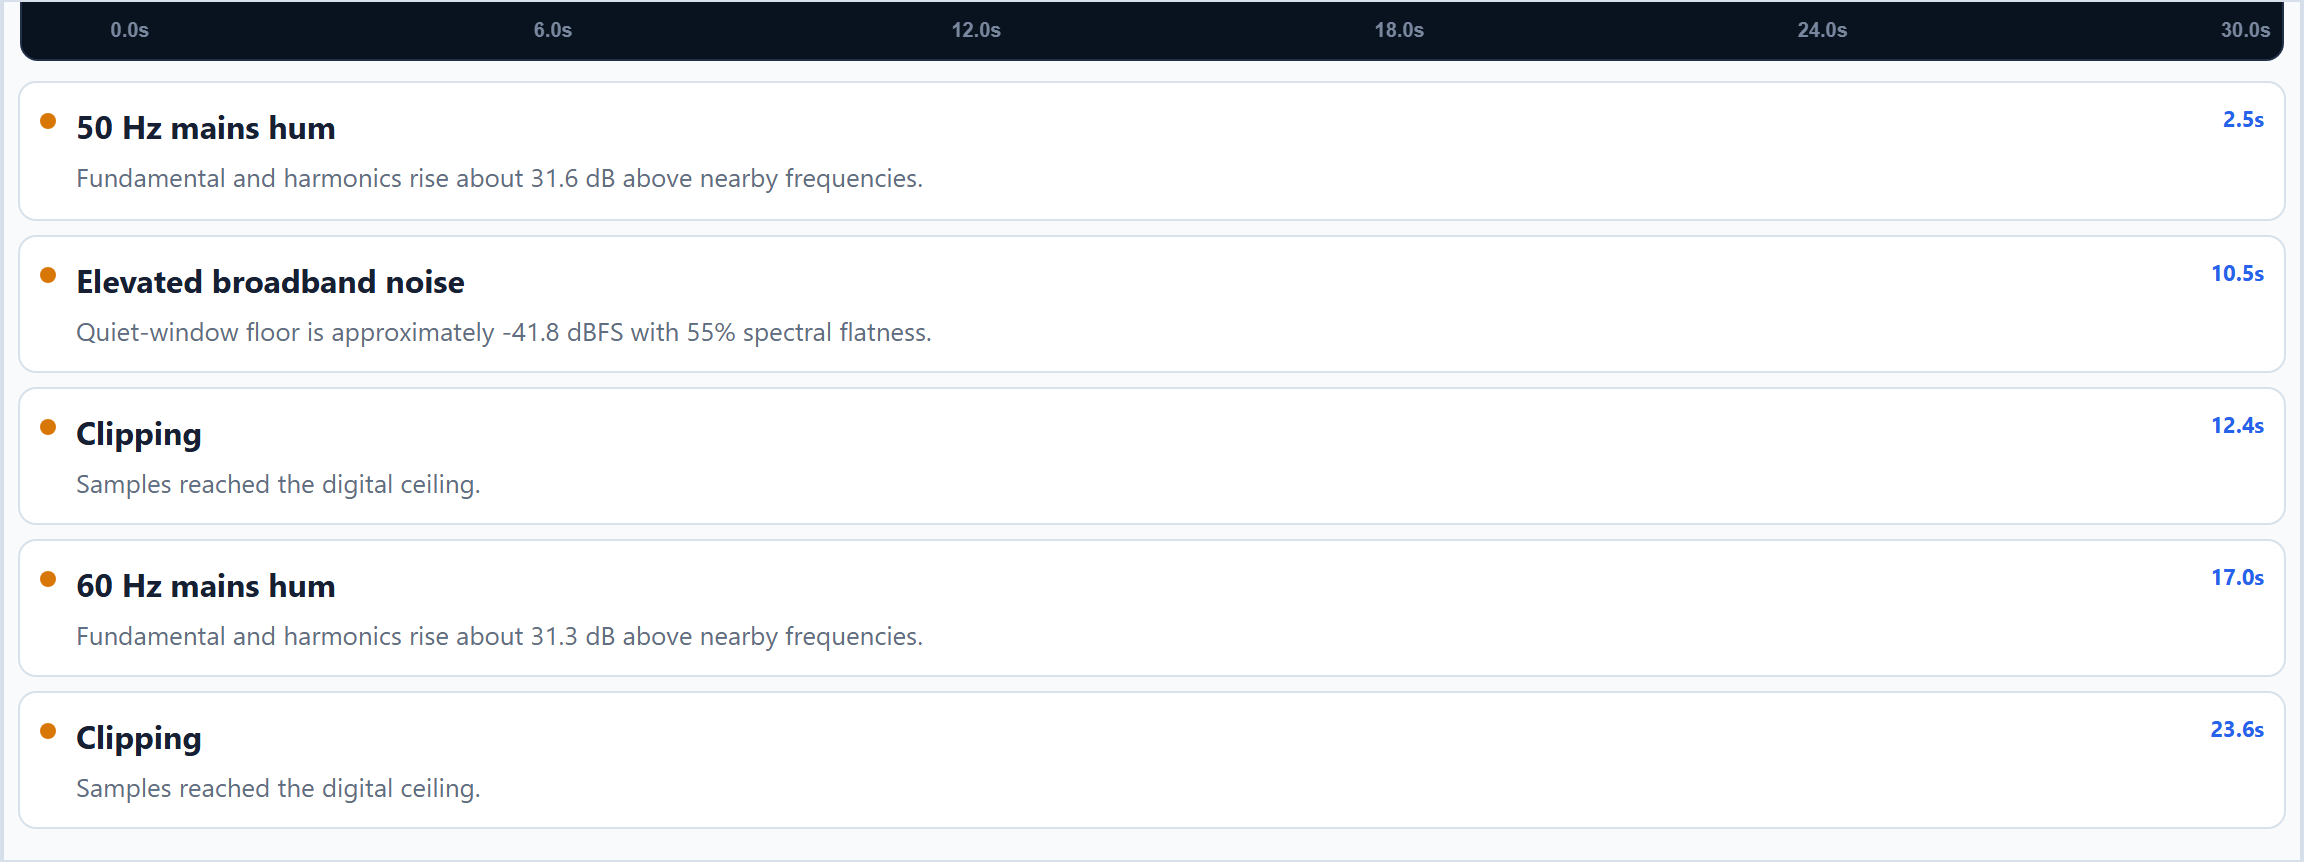
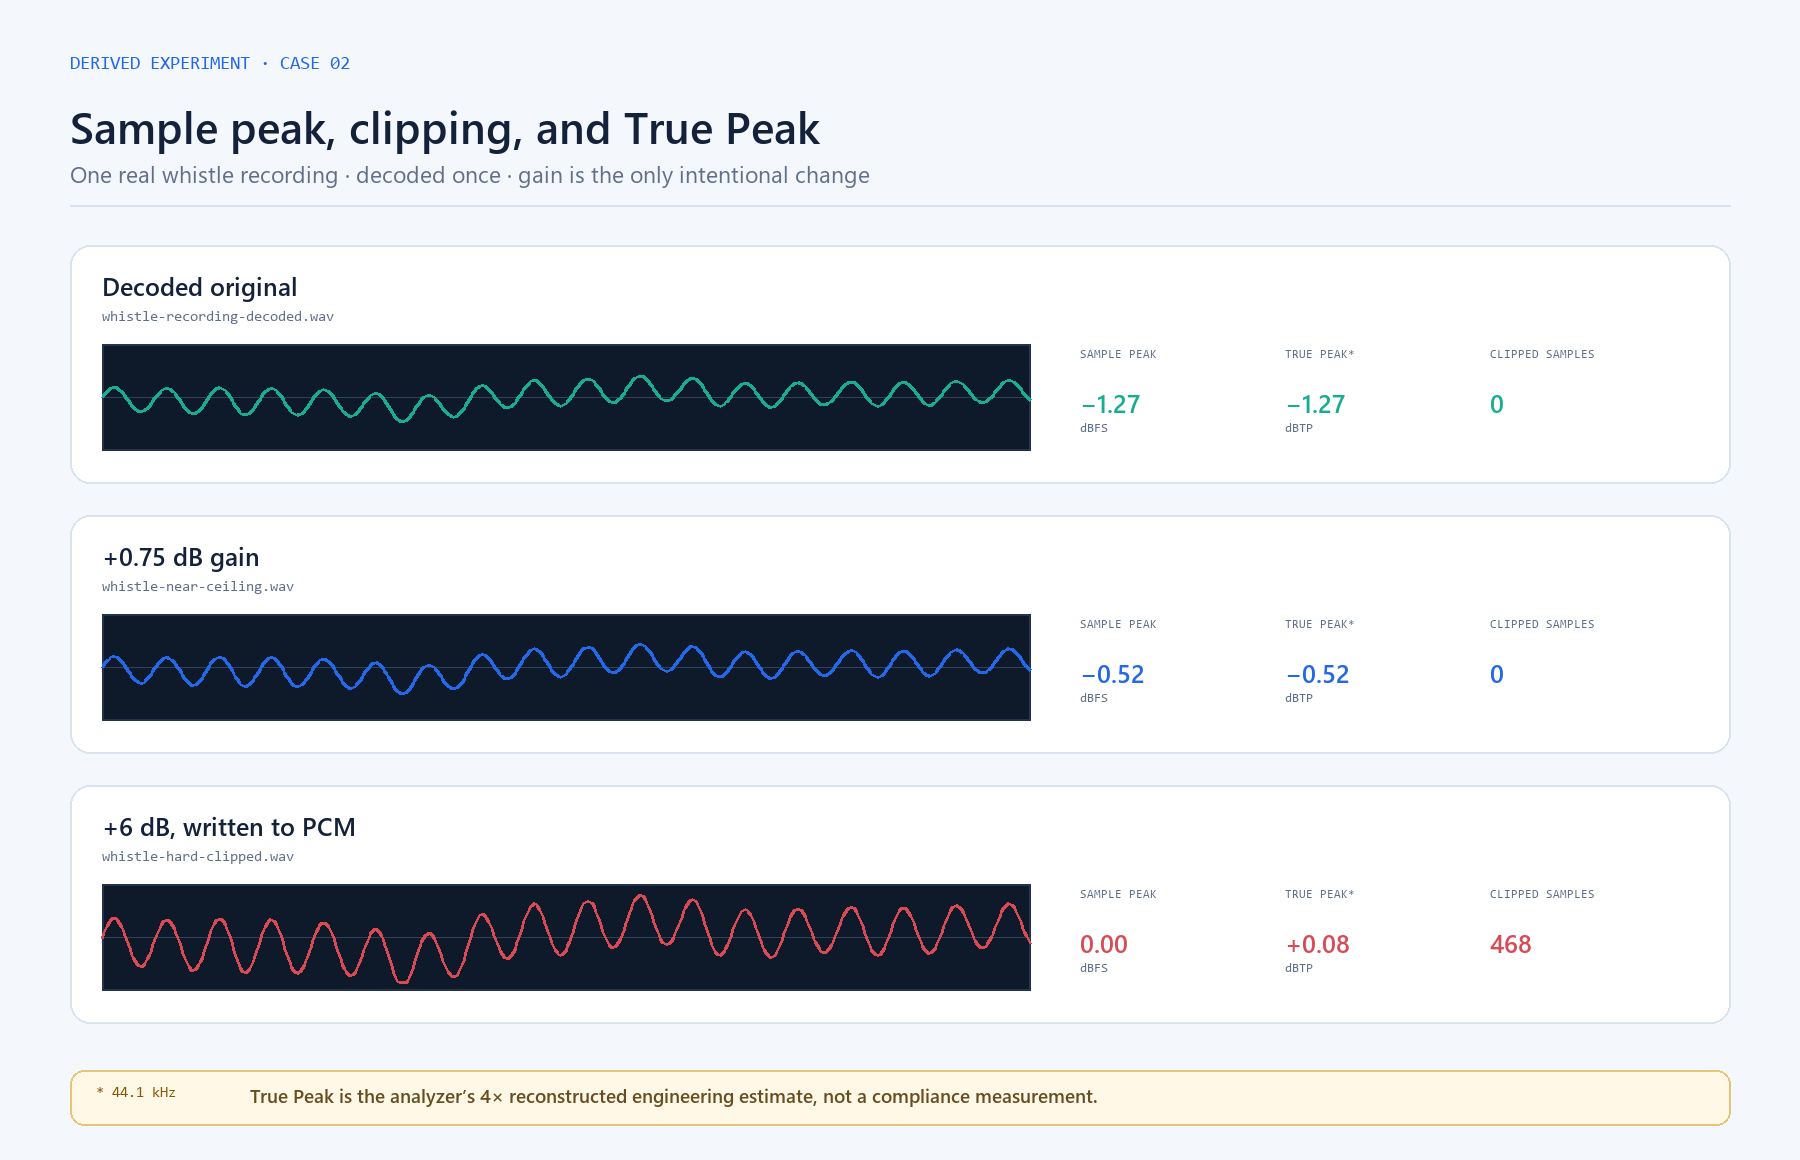
Digital clipping occurs when samples reach or attempt to exceed the system's maximum representable level. Hard clipping can flatten waveform peaks and create new harmonics that sound harsh or brittle. A sample touching 0 dBFS is evidence worth inspecting, but one isolated full-scale sample is not always audibly damaged; duration, repetition, and waveform shape matter.
If clipping is present in the recorded file, lowering the playback fader afterwards does not restore the lost waveform. Return to the earliest overloaded stage: microphone placement, preamp gain, analogue input, plug-in chain, bus, or limiter. Preserve headroom before encoding, then analyse the exported file again.
- 01
Jump to the reported time
Click every clipping timestamp and listen before and after the marked transient.
- 02
Compare both peak measurements
Read sample peak and True Peak together because stored samples and reconstructed peaks answer different questions.

- 03
Inspect repeated ceiling hits
Look for repeated or sustained hits rather than classifying an entire recording from one isolated sample.
- 04
Correct and verify the source
Fix the earliest overloaded stage, export again, and repeat the same measurement with unchanged settings.
Separate broadband noise from wanted ambience
Broadband noise spreads energy across a wide frequency region. Electronic hiss often rises toward the upper spectrum, while room and ventilation noise may concentrate lower. A practical noise-floor estimate uses quiet windows in which the normal recording chain remains active, then examines both their RMS level and spectral flatness.
The quietest window is not automatically representative. A fade, digital silence, edit gap, or muted channel can make the number look better than the real recording conditions. Compare several quiet sections, listen through headphones, and check whether the texture follows the programme material.
Confirm 50 or 60 Hz mains hum and its harmonics
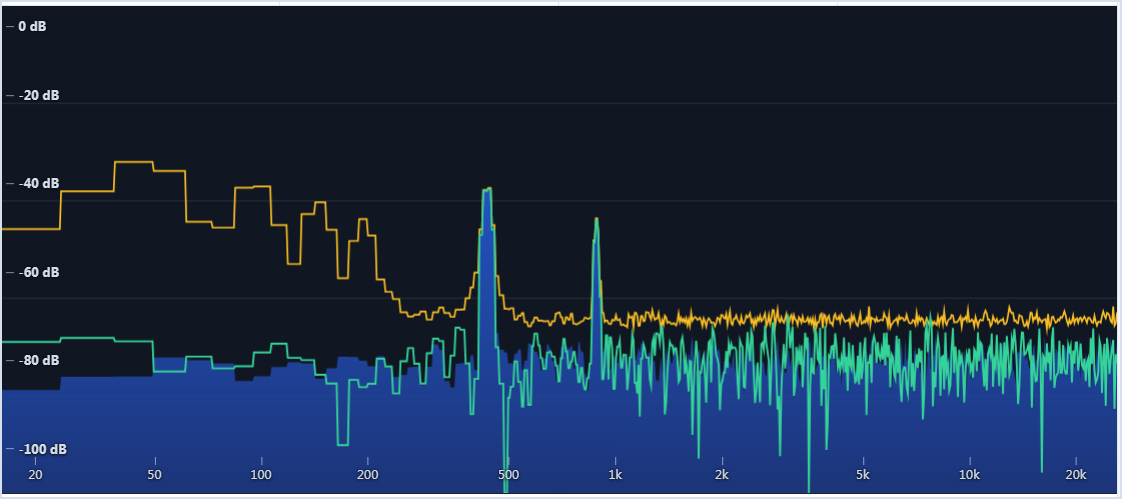
Mains-related hum usually appears at 50 Hz or 60 Hz, depending on the electrical system, with energy at integer multiples such as 100, 150, 120, or 180 Hz. A family of narrow peaks is stronger evidence than one low-frequency peak, because music, HVAC systems, engines, and handling noise can also create energy near the mains frequency.
Common causes include ground loops, unbalanced connections, damaged shielding, power supplies, lighting dimmers, and audio cables running beside mains adapters. Disconnect or move one component at a time, keep the same gain and microphone position, and compare the same passage after each change. Filtering can reduce the symptom, but removing the coupling source usually produces a cleaner result.
For a voice-over-specific troubleshooting perspective, Such A Voice’s guide to eliminating hums and hisses also emphasizes identifying and preventing noise at the source before relying on post-production cleanup.
- 01
Check the fundamental and harmonics
Confirm that the suspected 50 or 60 Hz component and several exact multiples rise above their neighboring bins.
- 02
Check persistence over time
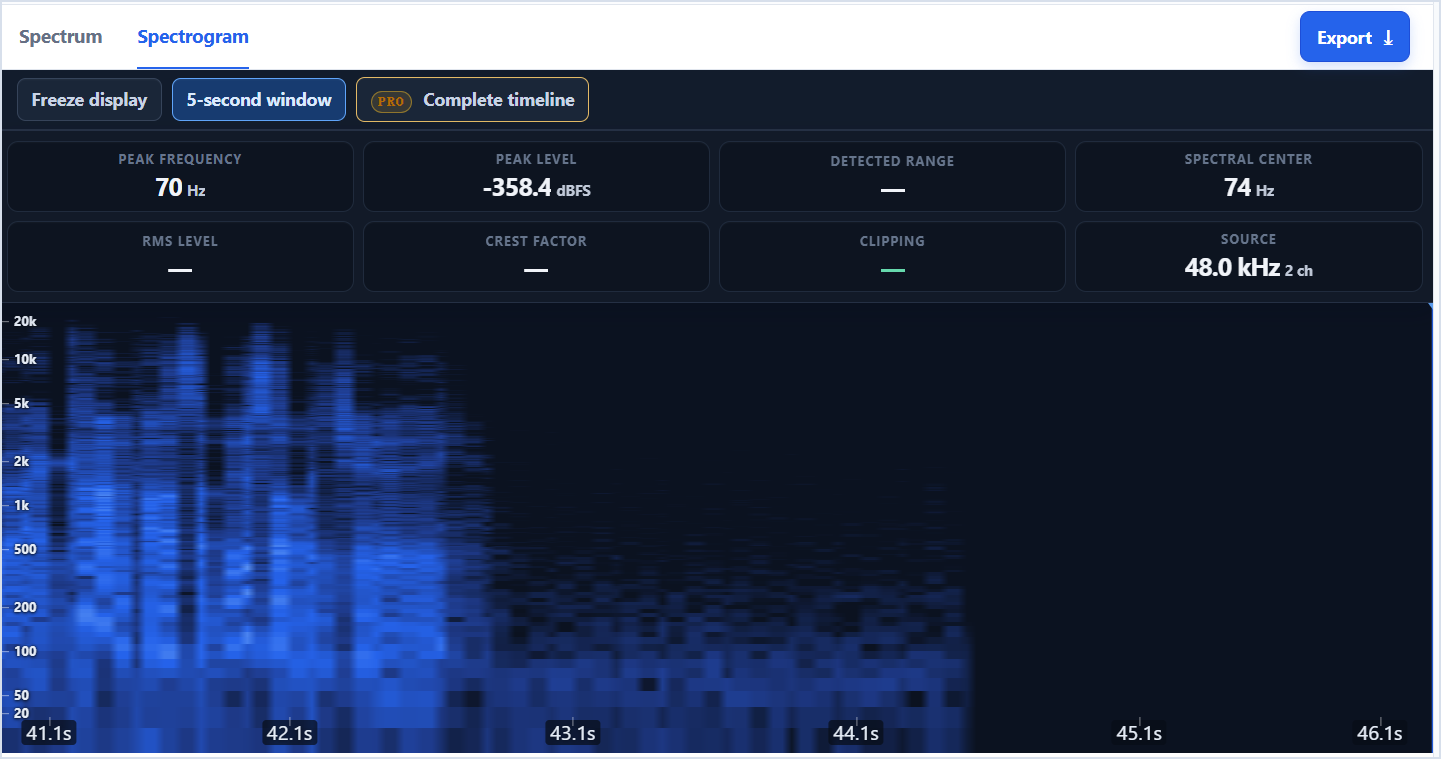
Use the spectrogram to distinguish continuous narrow lines from short mechanical or handling events.
- 03
Change one physical cause
Test cable routing, grounding, and power supplies one at a time while keeping the recording setup fixed.

- 04
Run the complete scan again
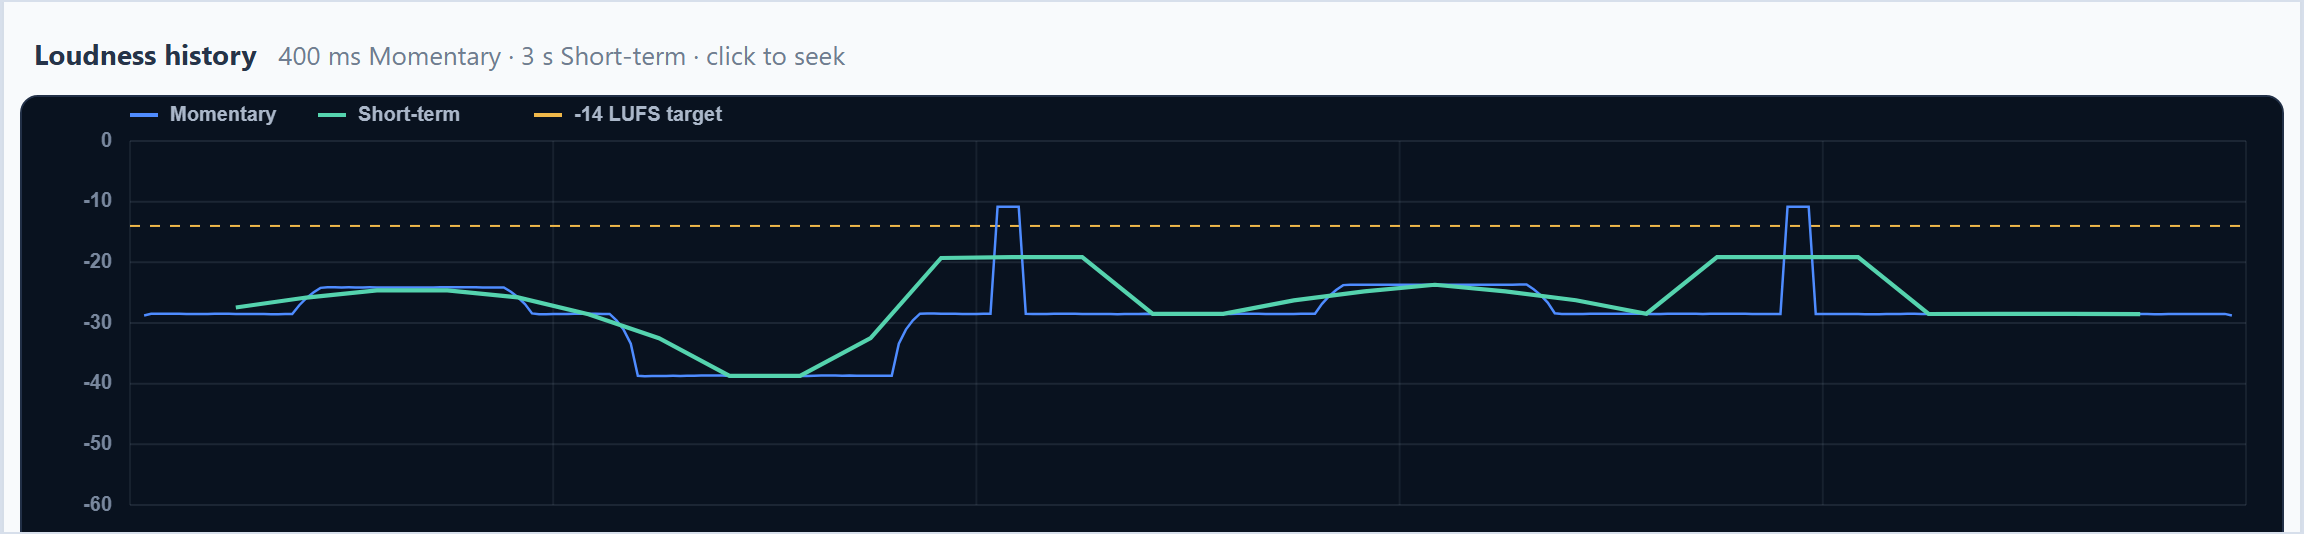
Repeat the full-file analysis and compare the same locations to verify that the suspected hum has actually fallen.
Common questions
Does a 0 dBFS sample always mean audible clipping?
It is a warning that deserves inspection, but audibility depends on the waveform, duration, repetition, and surrounding material.
Why does hum have several peaks?
A non-sinusoidal interference waveform and the affected equipment can produce harmonics at multiples of the 50 or 60 Hz fundamental.
Can noise reduction completely remove broadband noise?
It can reduce noise, but aggressive settings may damage speech consonants, ambience, and musical detail. Correct the recording chain first when possible.
Are automatic findings proof of a fault?
No. They are engineering screening results. Confirm each timestamp by listening and inspecting the surrounding signal.
See the frequencies for yourself.
Upload a file, use the microphone, freeze any moment, and export the result.
Analyze audio